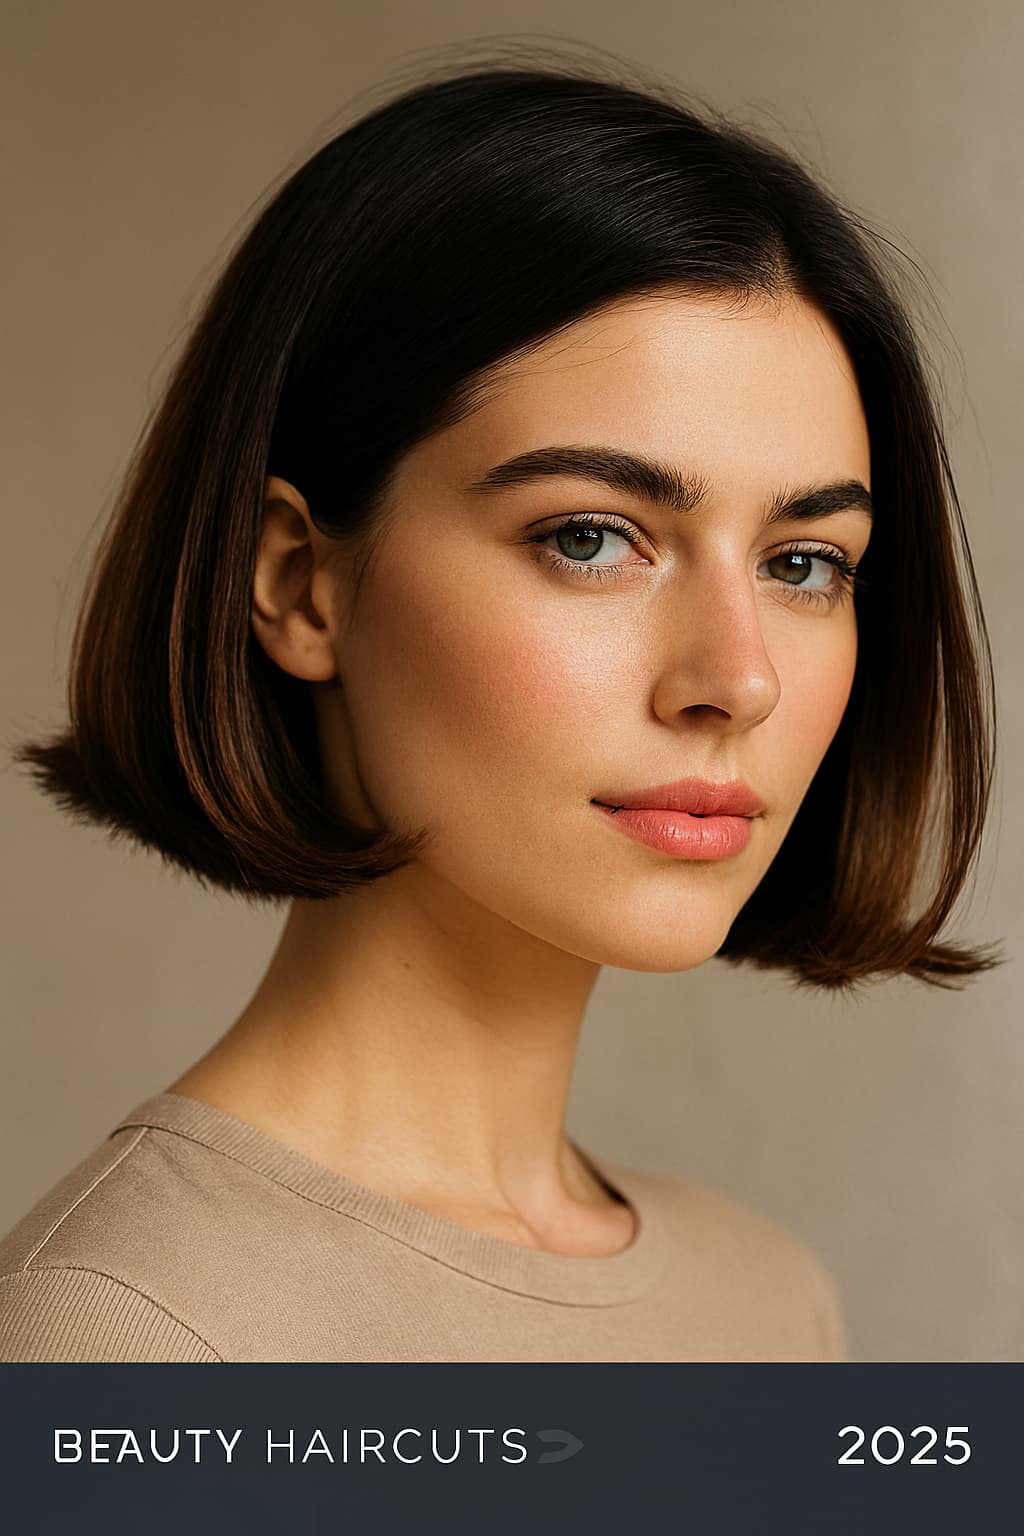

Buns have moved past their old job as a laundry-day fallback. They’re now one of the most requested updo categories in salons, and the reason is fairly practical. A bun reads polished even on hair that hasn’t been washed in two days. It survives a commute, a full workday, and still looks intentional by dinner. Few other styles pull off that range.
What’s trending right now leans toward buns with visible texture — a piece left loose at the crown, a little wave kept in before wrapping, cool strands framing the face instead of every hair pulled flat. Full slick buns still show up on red carpets and in editorial shoots, but the version people actually wear day to day photographs looser and holds up better on second-day hair.
Here’s a styling truth most tutorials skip: a bun that looks effortless in a photo usually took more product and more time than a simple blowout would have. The “undone” look is a technique, not a shortcut. If your hair is freshly washed and slippery, a messy bun slides loose within the hour unless you add texture spray first.
This list breaks down fifteen bun styles by hair type, face shape, and how much patience each one actually asks for — not just how good it looks in a single photo.
1. The Sleek Low Chignon

This is the bun most people picture first: hair pulled back smooth, no flyaways, wrapped into a rounded knot that sits right at the nape. A clean middle or side part does most of the work here.
It suits straight and wavy hair best. Fine hair needs a little backcombing at the crown first, or the scalp shows through once everything’s pulled tight. Thick hair holds the shape with far less product.
Placement matters for face shape. Sitting low, it doesn’t add height, which makes it a safe choice for round and oval faces. On a strong, angular jaw, a side part softens the effect more than a center part does.
Difficulty sits in the middle — smoothing hair without it looking gel-lined and flat takes a few tries. Expect to redo it daily unless you set the edges with a light gel. If you want softer movement around the face, ask your stylist to leave a couple of shorter face-framing pieces rather than cutting everything one length.
2. The Textured Top Knot

A high knot with one piece pulled loose for volume, twisted rather than wrapped tight — this one reads casual by design.
Hair with natural wave or texture holds the shape best. Very fine hair goes limp by early afternoon unless you work dry shampoo into the roots before styling, which gives the knot something to grip.
Because it sits high, it elongates round and square faces nicely. On an already long face, keep it slightly lower on the crown so it doesn’t add extra height on top of what’s already there.
This is the easiest style on the list for a beginner. Maintenance is low — it can last a full day and just needs a spritz of texture spray to refresh by evening. No special cut is required, though face-framing layers help soften the look near the temples.
3. The Braided Crown Bun

A braid starts near one temple, wraps around the head like a halo, then tucks into a low bun at the back. It’s one of the more structured options here.
You’ll want at least shoulder-length hair, and second-day hair braids more easily than freshly washed hair, which tends to be too slippery to hold a clean braid line. Heart-shaped faces do particularly well with this one — the braid softens a narrower chin.
This is the hardest style on the list to learn. Braiding around the curve of your own head takes real practice, and most people need a mirror behind them the first several attempts. Once it’s in, the braid loosens gradually through the day, which honestly improves the look rather than ruining it. If you want pieces to fall out naturally around your face by afternoon, mention that to your stylist and ask for longer face-framing layers rather than a blunt cut.
4. The Undone Messy Bun

Loose, twisted rather than wrapped, with pieces falling out on purpose and uneven volume throughout. It looks casual, but getting the “on-purpose” part right isn’t as simple as it looks.
Medium to thick hair with some texture does this best. Very fine, straight hair struggles to hold the loose bulk this style needs — it tends to read as unbrushed rather than styled.
This is broadly flattering across face shapes since it softens edges without adding harsh lines anywhere. The technique itself is easy, but the result is easy to get wrong. A bun that’s actually messy looks different from a bun deliberately styled to look messy — the second one still needs some structure underneath.
It’s forgiving day to day and can last two days without a redo. If you want it to hold its shape rather than collapse, tell your stylist you want movement preserved — ends that are over-thinned won’t hold the loose bulk this style relies on.
5. The Ballerina Bun

Tight, high, centered, and smooth — the classic dancer shape, and probably the most recognizable bun there is.
Any hair texture can wear this once it’s smoothed down, though curly hair needs more prep product to avoid frizz at the crown. Thick hair holds the shape with less effort than fine hair, which may need a donut or padding underneath.
This is one of the less forgiving options for face shape. Pulled very tight and very high, it can look severe on a round face and draws attention straight to the forehead. Keeping slightly softer at the temples helps balance that.
Tension matters more here than in almost any other style — too tight and you’ll feel it in a headache by mid-afternoon, or notice tenderness along the hairline. If you wear this style often, it’s worth asking your stylist about a slightly looser version to reduce ongoing pull on the hairline.
6. The Twisted Rope Bun

Two sections twisted together like rope, then coiled into a knot — it has a spiral texture that a plain wrapped bun doesn’t.
Mid to long length works best, and hair with a slight natural wave grips itself well during the twist, which makes the whole thing more stable. Oval and heart-shaped faces suit this one nicely; it adds visual interest without adding bulk near the jaw.
Twisting is more forgiving than braiding, so this sits at easy-to-medium difficulty. The twist loosens gradually over the day but honestly still looks intentional even half-undone, which isn’t true of every style on this list. No specific cut is required to wear it well.
7. High Double Space Buns
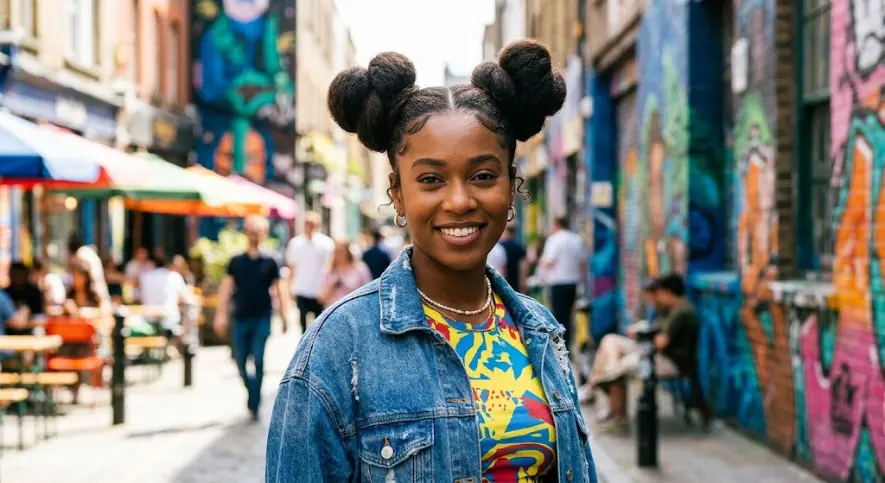
Two symmetrical buns set high on the crown — playful, a little youthful, and one of the more casual entries here.
You’ll want enough length and thickness to fill both buns; very fine hair can look sparse once split into two sections. Because the style visually widens the upper part of the head, it suits longer face shapes better than it does already-round or shorter faces.
The technique is easy, though getting both sides symmetrical takes a couple of attempts before it becomes automatic. Maintenance is low — this is a daytime, casual style rather than an evening one. Blunt ends tend to look cleaner in this shape than heavily layered ends, so mention that if you’re due for a trim beforehand.
8. The French Twist Bun

A vertical twist runs up the back of the head and folds into a small pinned knot at the crown. This is the formal end of the bun spectrum.
Straight to wavy, medium-to-thick hair twists most cleanly. Curly or coily hair can absolutely wear this, but it needs more smoothing product to fold flat without bumps. Because the style adds height, it flatters round and square faces especially well — on an already long face, it can add more length than you want.
This is a hard style to learn on your own. Pinning the fold flat without visible lumps takes real practice, and it’s worth a trial run before wearing it to an actual event. Once it’s pinned properly, though, it holds through a full evening with barely any touch-ups needed. This isn’t a wash-and-go morning style — treat it as a special-occasion look and practice it once or twice at home first.
9. The Wrapped Braid Bun

A single braid wraps around a low bun base like a ribbon, hiding the hair tie underneath. It’s a small detail that makes the whole thing look more finished.
Longer hair works better here since you need extra length to wrap all the way around. Medium-to-thick hair holds the braid’s shape more clearly than fine hair does. Because it sits low and close to the head, this is one of the more universally flattering options on the list.
Difficulty is moderate — you’re braiding one section, then wrapping and pinning it separately from the rest. Once it’s secured, it’s fairly stable through a full day. No specific cut is needed, though keeping length at the ends gives you more braid to wrap with.
10. The Half-Up Bun
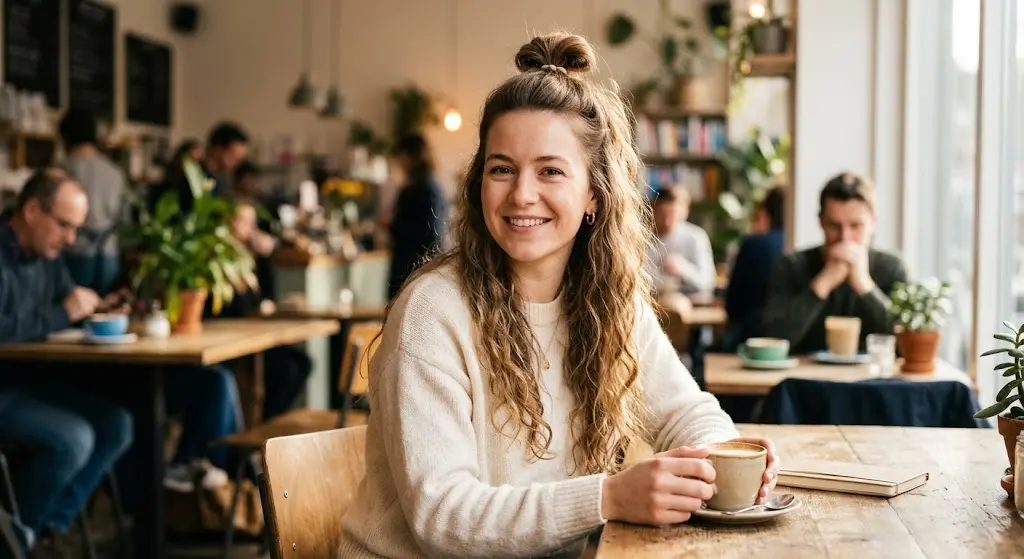
Only the top section is gathered into a small bun; the rest of the hair stays down. It’s the lowest-commitment updo on this list.
This works on almost any length past the chin, and it’s a good option for thinner hair since only a small portion is actually bunned — the rest still reads as full, loose hair. Because most of your hair frames your face rather than being pulled back, face shape has less impact on how this one looks on you, which makes it a safe starting point if you’re not sure a full updo suits you yet.
It’s the easiest style here to execute and quick to redo throughout the day. If you want extra movement in the section left down, ask your stylist for a little face-framing layering.
11. The Bubble Bun
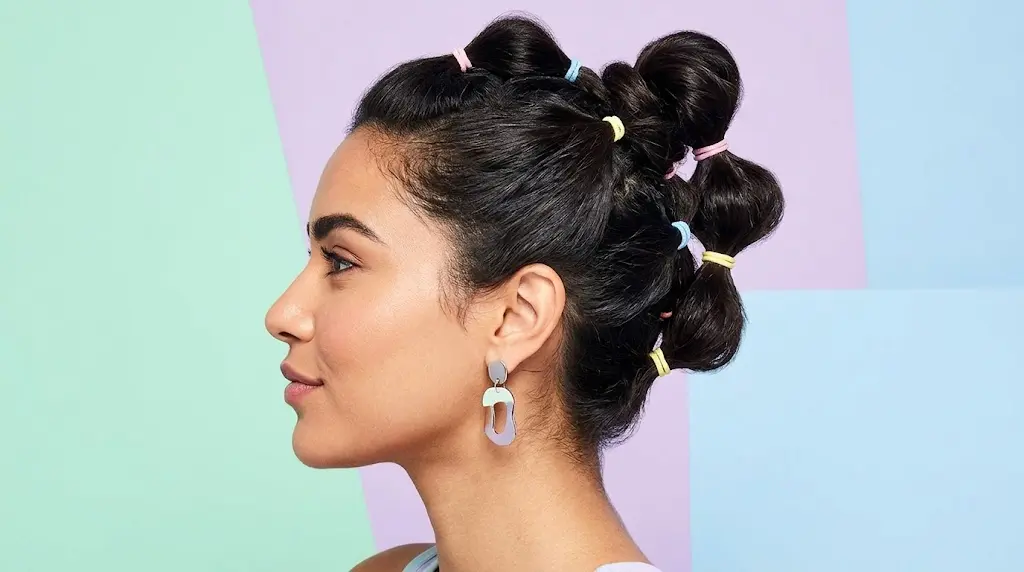
The hair is sectioned with several small ties, creating stacked “bubble” segments before the final knot — a playful, slightly maximalist take on the classic bun.
You need decent length and thickness for the bubbles to actually read as bubbles; on very fine hair, each segment can look thin or collapse rather than pouf out. This style is more about texture and fun than about correcting a particular face shape, so most people can wear it.
Sectioning evenly takes a couple of practice runs, which puts this at medium difficulty. Some bubbles loosen faster than others throughout the day, so expect a bit of asymmetry by the afternoon — that’s normal, not a sign you did it wrong. No specific cut is required.
12. The Voluminous Sock Bun
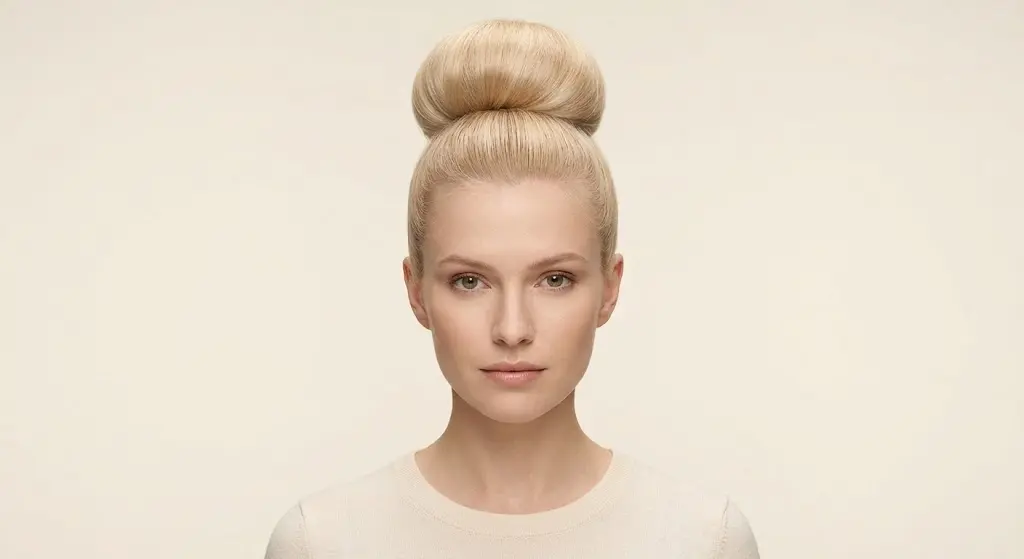
Hair wraps around a foam “sock” or donut shape, which gives a full, rounded bun without needing extensions or a ton of natural volume.
This is genuinely useful for fine or thin hair that wants a fuller bun shape than it can produce on its own. Thick hair, on the other hand, often doesn’t need the tool at all — there’s already enough volume without it. Because it rounds out the shape so noticeably, it can look heavy on an already round face; a slightly lower placement helps.
The technique is easy once you’re used to the tool, though the first attempt tends to feel awkward and lopsided. After that, it comes together quickly. No cut adjustment is needed — this is purely a tool-and-technique style.
13. The Asymmetrical Side Bun

The bun sits off to one side rather than centered, kept a little undone for a softer, more romantic finish.
Wavy or curly texture works especially well here, since the natural irregularity of the hair hides any unevenness in the sections. This style softens one side of the face more than the other, which makes it a good option for heart or square face shapes looking to balance a stronger jawline.
Difficulty is easy to medium. The main challenge is keeping it in place — buns set off-center tend to drift back toward the middle over several hours unless they’re pinned well. No specific cut is required, though longer face-framing layers help the asymmetry read as intentional rather than accidental.
14. The Face-Framing Romantic Bun
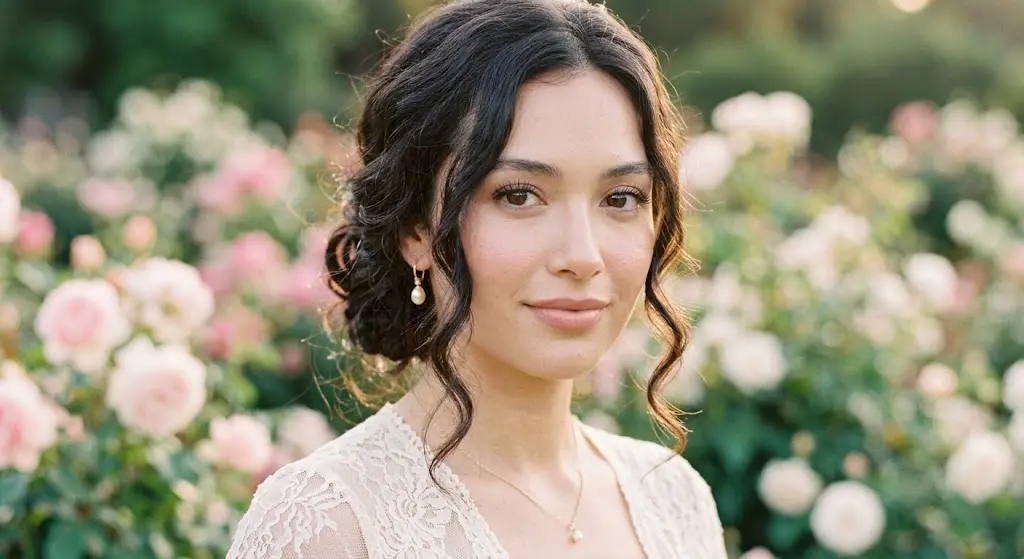
A soft, low bun with a few curled tendrils left loose at the temples and around the face. This is one of the more universally flattering styles here, largely because of those framing pieces.
It works best when a stylist has already cut some shorter layers around the face — blunt, one-length hair simply doesn’t have pieces short enough to curl and frame afterward. Because the tendrils soften whatever’s underneath them, this suits square or more angular jawlines particularly well.
Medium difficulty, mostly because the curling happens as a separate step after the bun itself is done. Maintenance sits in the middle too — those tendrils may need a quick re-curl if humidity flattens them out. When you’re at the salon, ask specifically for “face-framing layers,” not just “layers.” Said the wrong way, a stylist might cut layers through the whole head instead of isolating just the shorter pieces near your face.
15. The Slicked-Back Editorial Bun
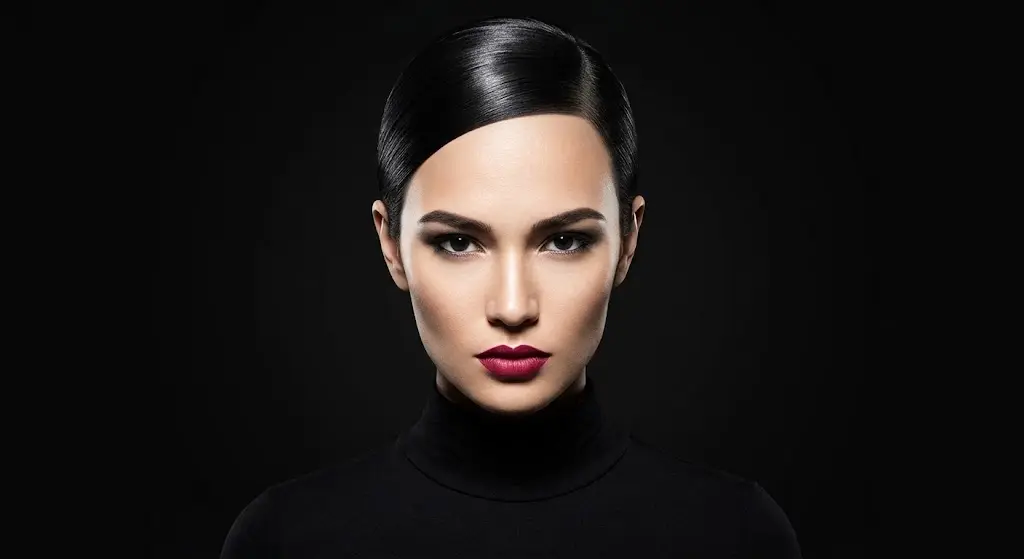
Hair fully slicked with gel, no visible part, a glass-like shine, and a small, tight bun at the nape or crown. This is the red-carpet, high-fashion end of the bun spectrum.
Any texture can wear it with enough gel, though curly or coily hair needs a real commitment to product and technique — usually gel plus an edge control — to lay completely flat. It’s a bold, structural look that suits confident, angular features well; on a softer, rounder face, keeping the bun lower at the nape prevents it from looking overly severe.
This is genuinely hard to execute without visible product buildup or dry patches showing through. It’s not a casual daytime style — gel can start to flake or feel stiff by evening, and it needs a full wash to remove properly. If you’re asking a stylist to do this for an event, request the “wet look” finish by name. Regular styling products won’t get you the same shine as a dedicated edge or gel product made for this specific look.
Styling & Maintenance Advice
A few realities apply across almost every bun on this list. Heat styling still matters even for an updo — a loose wave from a curling iron or flat iron gives fine, straight hair something to grip, which makes buns like the undone messy bun or the twisted rope bun hold their shape far longer than they would on freshly straightened hair.
Trims matter more than people expect. Split ends don’t hide in a bun — they show up as fuzzy, frayed texture right at the surface of the knot, especially on sleek styles like the low chignon or the slicked-back bun. A trim every eight to ten weeks keeps that surface looking clean.
On product: texture spray or dry shampoo at the roots before styling gives slippery, freshly washed hair something to hold onto. A small amount of gel or edge control tames flyaways along the hairline without weighing down the rest. For anyone who wants more volume without extra hair, a foam donut solves that without any product at all.
Humidity is the real enemy of a clean bun. If you’re in a humid climate, expect frizz at the crown and temples within a couple of hours regardless of how much product you used going in — a light anti-frizz serum on dry hair before styling helps more than trying to fix it afterward.
If you’re new to bun styling, start with the half-up bun or the textured top knot. Both are forgiving of uneven sections and don’t require pinning skills the way a French twist or braided crown does.
What to Ask Your Stylist
- Ask for face-framing layers specifically, not just “layers,” if you want curled or loose pieces around your face. A general layering request often gets applied through the whole head instead.
- If you wear tight, high buns often, ask about a looser style or lower placement to reduce ongoing tension on your hairline.
- Mention that you want movement preserved in the ends if you’re going for a messy or undone look — heavily thinned ends won’t hold the bulk these styles need.
- For wrap-style buns (braided crown, wrapped braid bun), ask the stylist to keep length at the ends rather than cutting shorter layers throughout.
- If you’re planning to wear a French twist or other formal bun for an event, ask for a trial run at an earlier appointment rather than the first attempt happening the morning of.
Common Mistakes
- Pulling the bun too tight, too often — this causes headaches and, over months, can stress the hairline enough to thin it out.
- Using a plain elastic instead of a fabric-covered or spiral hair tie, which snags and breaks strands, especially on fine hair.
- Skipping prep product on freshly washed hair, then wondering why the bun looks flat or slides loose within an hour.
- Overusing gel on a slicked style, which builds up over a few wears and starts to flake rather than shine.
- Choosing a very high, tight bun for daily wear without considering the ongoing pull on the hairline over months, not just how it looks in one photo.
- Not accounting for how a layered cut grows out — some buns that look clean today get harder to smooth as layers grow past the bun line in a few months.
FAQ
How long does my hair need to be for a bun?
Most buns need at least shoulder-length hair to wrap fully. Shorter styles, like a half-up bun, can work with hair just past the chin since only the top section gets gathered.
Will wearing a bun damage my hair over time?
Not on its own, but consistently tight, high buns can put ongoing tension on the hairline, which is worth taking seriously if you wear the same tight style daily. Rotating placement and easing up on tension helps.
Can fine hair actually hold a full, voluminous bun?
Yes, with help. A foam donut or a bit of backcombing at the crown gives fine hair the bulk it doesn’t have naturally. Without that step, a bun on fine hair often looks thin by midday.
What’s the best product for a sleek, no-flyaway bun?
A small amount of gel or edge control along the hairline, applied with a toothbrush or small brush for control, works better than trying to smooth flyaways with your hands.
Who should avoid a very tight, high bun?
Anyone who already notices thinning near the hairline or temples, or who gets frequent tension headaches, is better off with a looser or lower bun. The ongoing pull from a tight, high style is the more common culprit than most people realize.
How do I stop a bun from slipping loose by the afternoon?
This usually comes down to hair being too clean and slippery. Texture spray or dry shampoo at the roots before styling, plus a couple of well-placed bobby pins crossed in an X rather than parallel, holds far longer than a hair tie alone.
Final Thoughts
None of these fifteen styles are interchangeable, even though they all fall under “bun.” The right one depends on how much time you actually want to spend on it, what your hair does on its own, and how it grows out between salon visits. Try one that matches your current length and texture before committing to a cut change for a style you saw once online — most of what makes a bun look good comes down to prep and practice, not a dramatically different haircut.